Beautiful Horse Property With 34.5 Acres

Featuring 3 Bedrooms, 2 Bathrooms And A 1,560 Square Foot Barn!

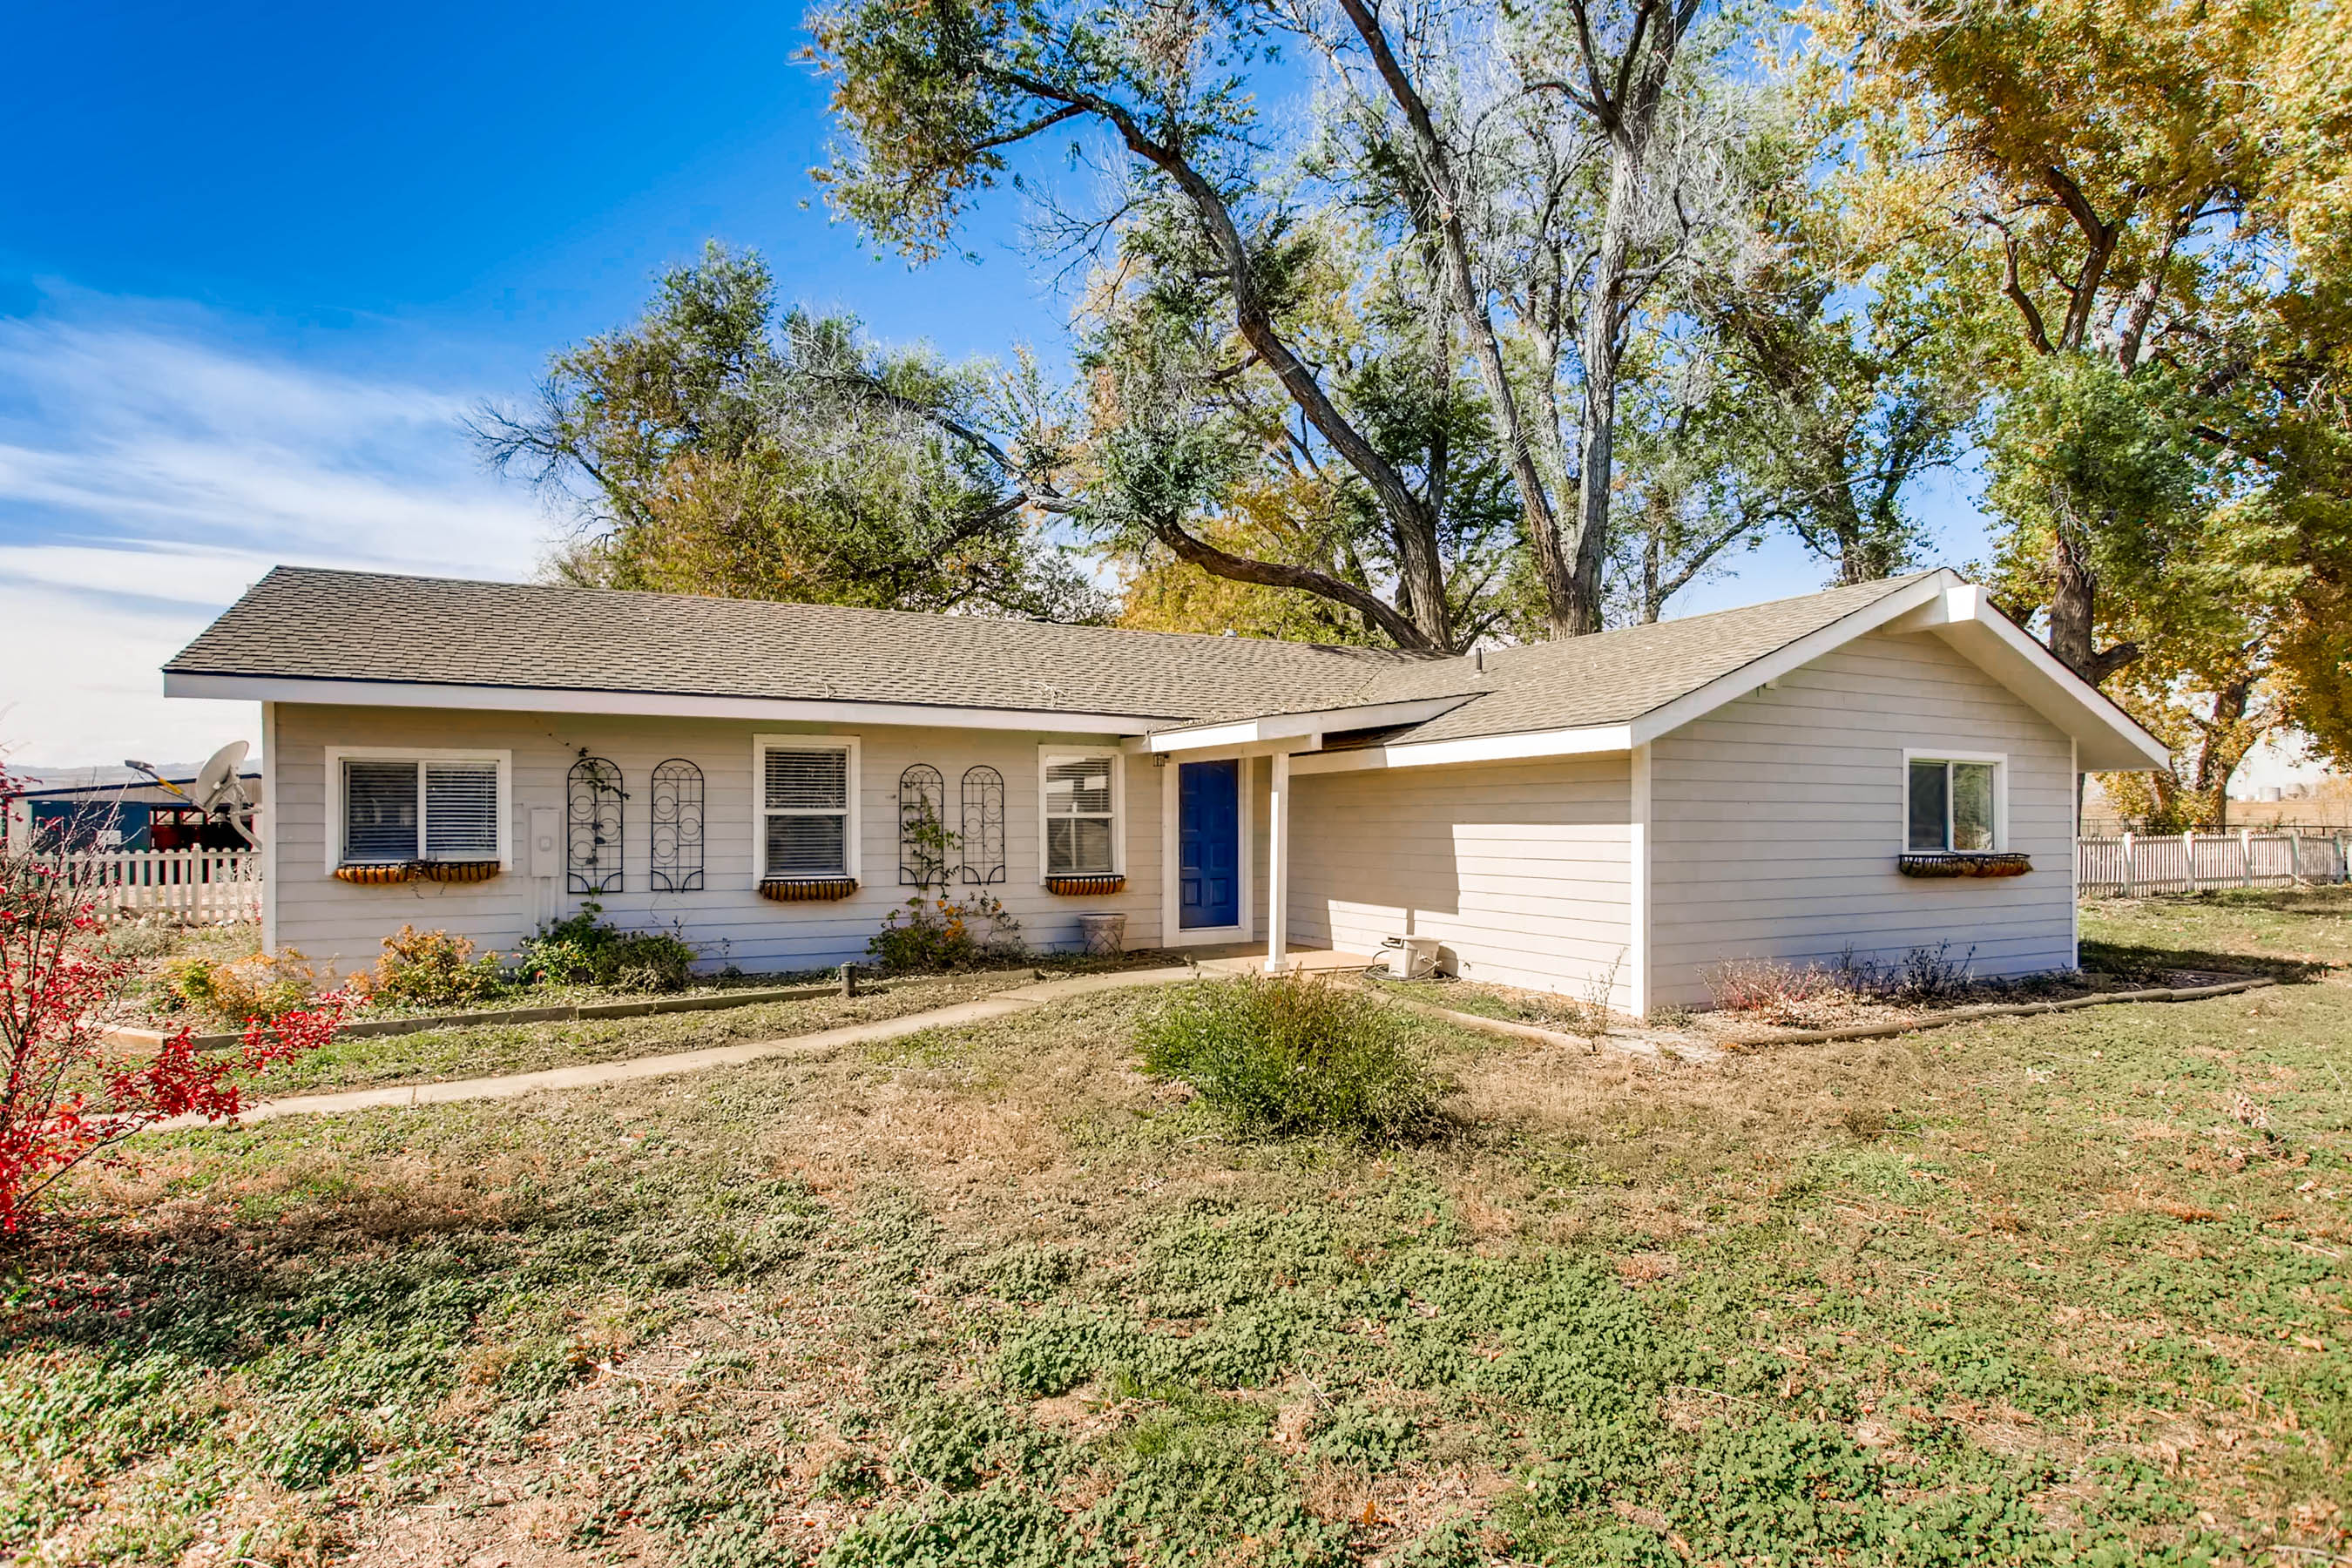
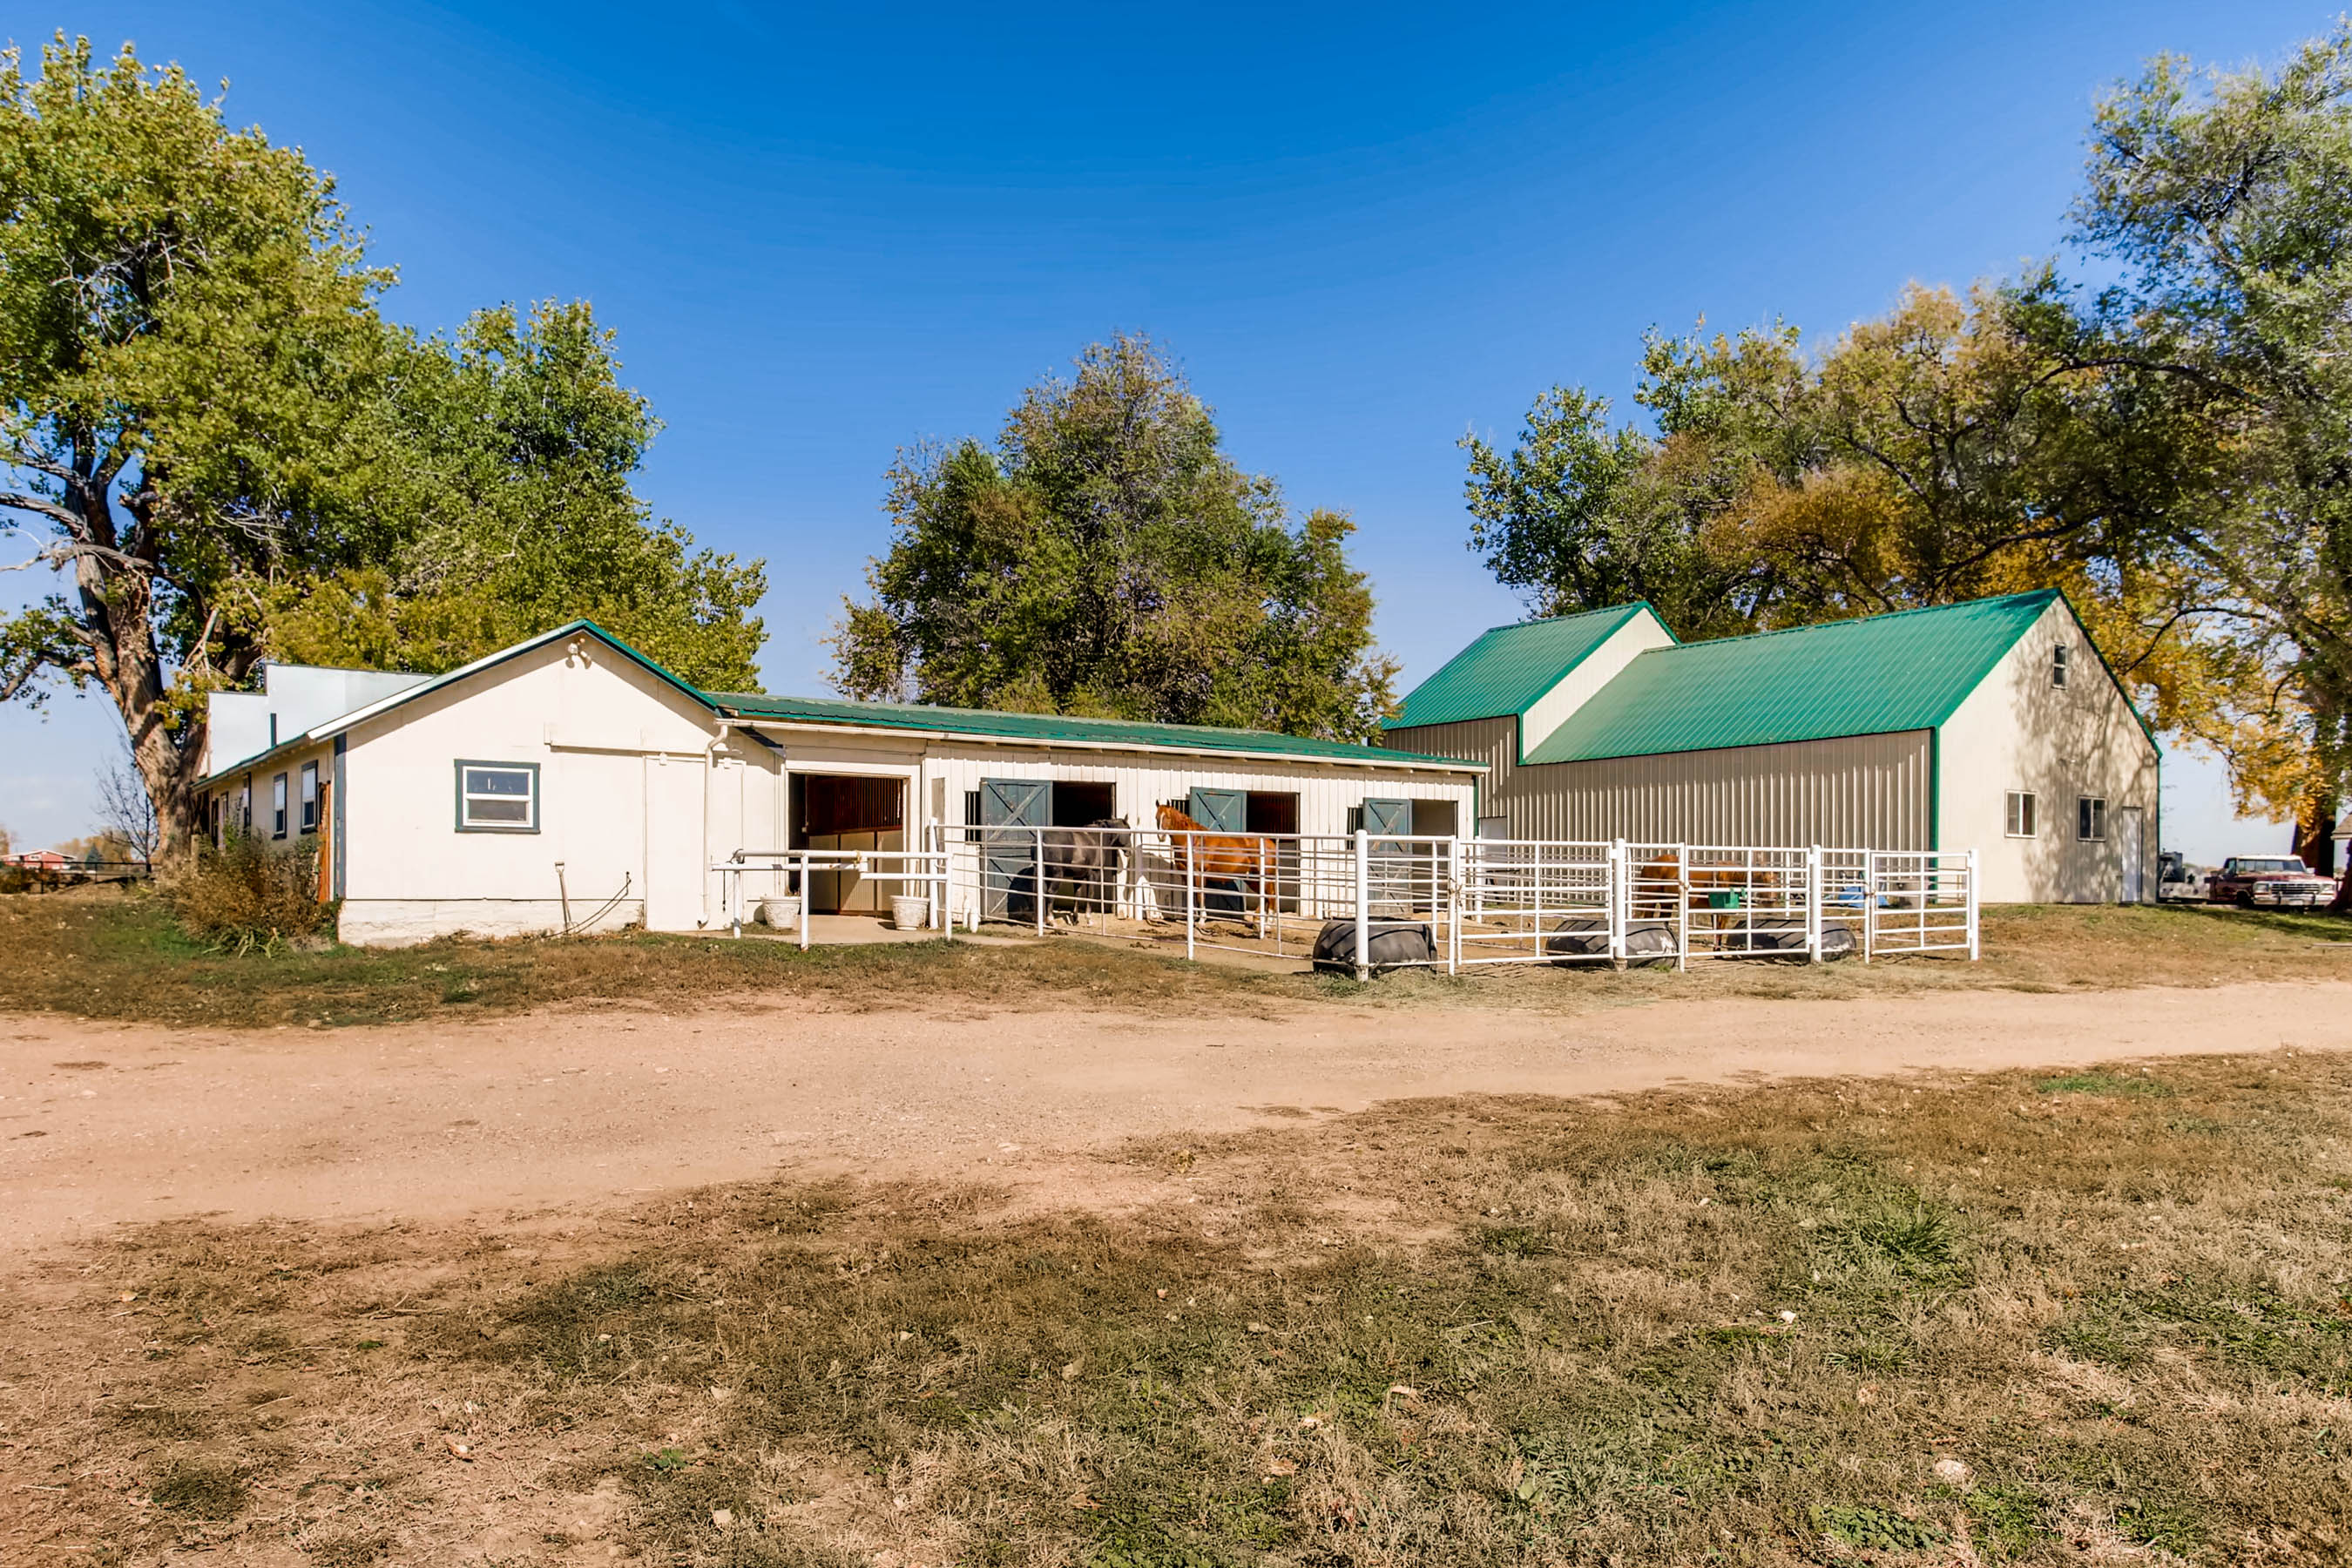
Amazing horse property! Many outbuildings, horse facilities, views and a cute updated home. Horse features include: 10 stalls, 8 loafing sheds, 15 auto waterers (in pastures and runs), outdoor arena, vet office, foaling stall, 1560 square foot hay barn, turn-out traps and a pasture. Outbuildings – 36×45 greenhouse with lights and hydroponics system, 1500 square foot pole barn/garage with 454 square foot loft/ bunk house. Home has been updated over the years and features an office, patio off of the master and a sunroom.

For more information, please visit: http://windermerenoco.com/listing/69423121 or call Meagan Griesel at (970) 460-3033.

The post Beautiful Horse Property With 34.5 Acres appeared first on Best Real Estate Agents in Northern Colorado.

The 4 Phases of Remodeling: The Honeymoon Stage

As with anything in life, a remodeling project can come with its ups and downs. Certain phases seem to go a mile a minute, while others feel like they’ve lasted a lifetime and a half, all while it looks as though nothing is being completed. Fear not — this is pretty typical. And, while every project is different, a good portion of renovations have four major phases, what I’m calling the Honeymoon, the Midproject Crisis, the Renewal of Vows and the Happily Ever After.

For now, let’s take a closer look at the Honeymoon phase of renovating.

Honeymoon 1: Homegrown Decor, LLC, original photo on Houzz

After weeks of searching for a remodeler in your area, calling references, checking out their Houzz profile and working toward an agreeable price, you say, “I do,” sign the contract, finalize the design and begin work in two weeks. There’s a little nervousness in the air, but as you enter the Honeymoon phase, the mood is mainly one of excitement.

Demolition Begins

A couple of weeks go by, and the day comes for work to start. Protective products are placed, and demolition begins. Demo, sweet, demo. Normally one of the quickest moving stages of a remodel, demolition makes it look as if a lot of work is being done practically overnight. Cabinetry is removed, walls are torn down, appliances are taken away and, in a matter of days or weeks (depending on the size of your project), you’re staring at a blank canvas.

After that, any necessary framing and structural work will begin. Framing usually isn’t as exciting or fast-paced as demolition, but still, there is visible progress almost daily. At this point, you and your partner are walking on air. The rate of work is astounding, and you’re still very excited (although maybe a little less nervous now) about the entire project.

Honeymoon 2: Blondino Design, Inc., original photo on Houzz

Speed Bumps Ahead!

However, like a delayed flight on a real honeymoon trip, there are obstacles that can slow down this phase, specifically during demo. If you’re living in an older house, there’s the possibility that when your walls are opened, asbestos or lead could be discovered, which will need to be dealt with before work can continue.

Another common speed bump is building permit delays. Going through government-mandated processes can be tricky sometimes, especially if you or your building professional don’t have everything you need to get the green light from your municipality the first time around.

More holdups can come from structural elements that become apparent after demolition. For example, say you were going to move a door to another wall in your dining room. Once the demo crew opens up the wall where the new door will be installed — surprise! — there are plumbing pipes running the height of the wall. Reconfiguring design to meet these new requirements will add time to the demo stage.

Don’t panic. These delays happen often, and it’s worth accounting for and accepting these hurdles before you even begin to think about renovating.

Honeymoon 3: Jim Schmid Photography, original photo on Houzz

Rolling With the Punches

To help your honeymoon run more smoothly, here are a few tips I’ve learned from witnessing hundreds of remodels (and even surviving a couple myself):

  • Embrace change. Really. Give change a huge hug. Get to know it on a personal level. Because no matter what room you’re touching (whether it’s the kitchen or a teensy guest bath), it’s likely that you use that room daily. The sooner you accept that this room (major or not) will be unavailable for a period of time, the sooner you’ll be able to adapt your daily routines to fit around it.
  • Love your microwave. This applies to kitchen remodels specifically. As soon as demo is done, your primary cooking and eating area will be gone. Before your project starts, find an untouched room in your home to create a mini kitchen that will include necessities such as a microwave, toaster oven and coffee pot. Think of it as the mini kitchen you had in your dorm or apartment in college and revel in the nostalgia.
  • Don’t worry too much. I know this sounds hard — OK, really hard, especially for control freaks like myself — but trusting your building professionals to know what they’re doing (even if you do come across one of the aforementioned speed bumps) will really help you keep your head on straight. And if you do have questions or concerns …
  • Communicate! Communication has proved time and time again to be one of the biggest parts of a remodel — and a successful marriage. I cannot stress it enough. Talk with your contractor, talk with your significant other — talk, talk, talk. Ask framing questions, bring up budgetary concerns, muse over paint colors. Whatever is on your mind, getting it out of your head and into the air is beneficial for everyone involved (especially you).

Honeymoon 4: Jeff Herr Photography, original photo on Houzz

And remember: The Honeymoon phase of a remodel is definitely one of the high points in a process with numerous peaks and valleys, so try to enjoy it. No matter what you may encounter during demolition and framing, it’s likely that the mood of everyone on board — you, your contractor, your family and even your pet — will be very positive.

Related: 15 Questions to Ask Before Buying a Fixer-Upper

You’ve just embarked on a new journey, and the excitement of watching the image of your new home come into focus just adds fuel to your fire. Revel in that post-contract-signing bliss and maybe enjoy a glass of your favorite beverage with your significant other while you two imagine the new space that will be formed in your newly torn-apart home. Enjoy it, because what lies ahead is a bit uncertain.

With that in mind: What happens when it feels like nothing is happening? Is there still work being done? Are we still on schedule? Is it OK to freak out a little bit? Read more in the upcoming article in this series, “The Midproject Crisis.”

By Hannah Kasper, Houzz

The post The 4 Phases of Remodeling: The Honeymoon Stage appeared first on Best Real Estate Agents in Northern Colorado.

Turn-Key Home In Southeast Fort Collins

Featuring 3 Bedrooms, 3 Bathrooms And Vaulted Ceilings!

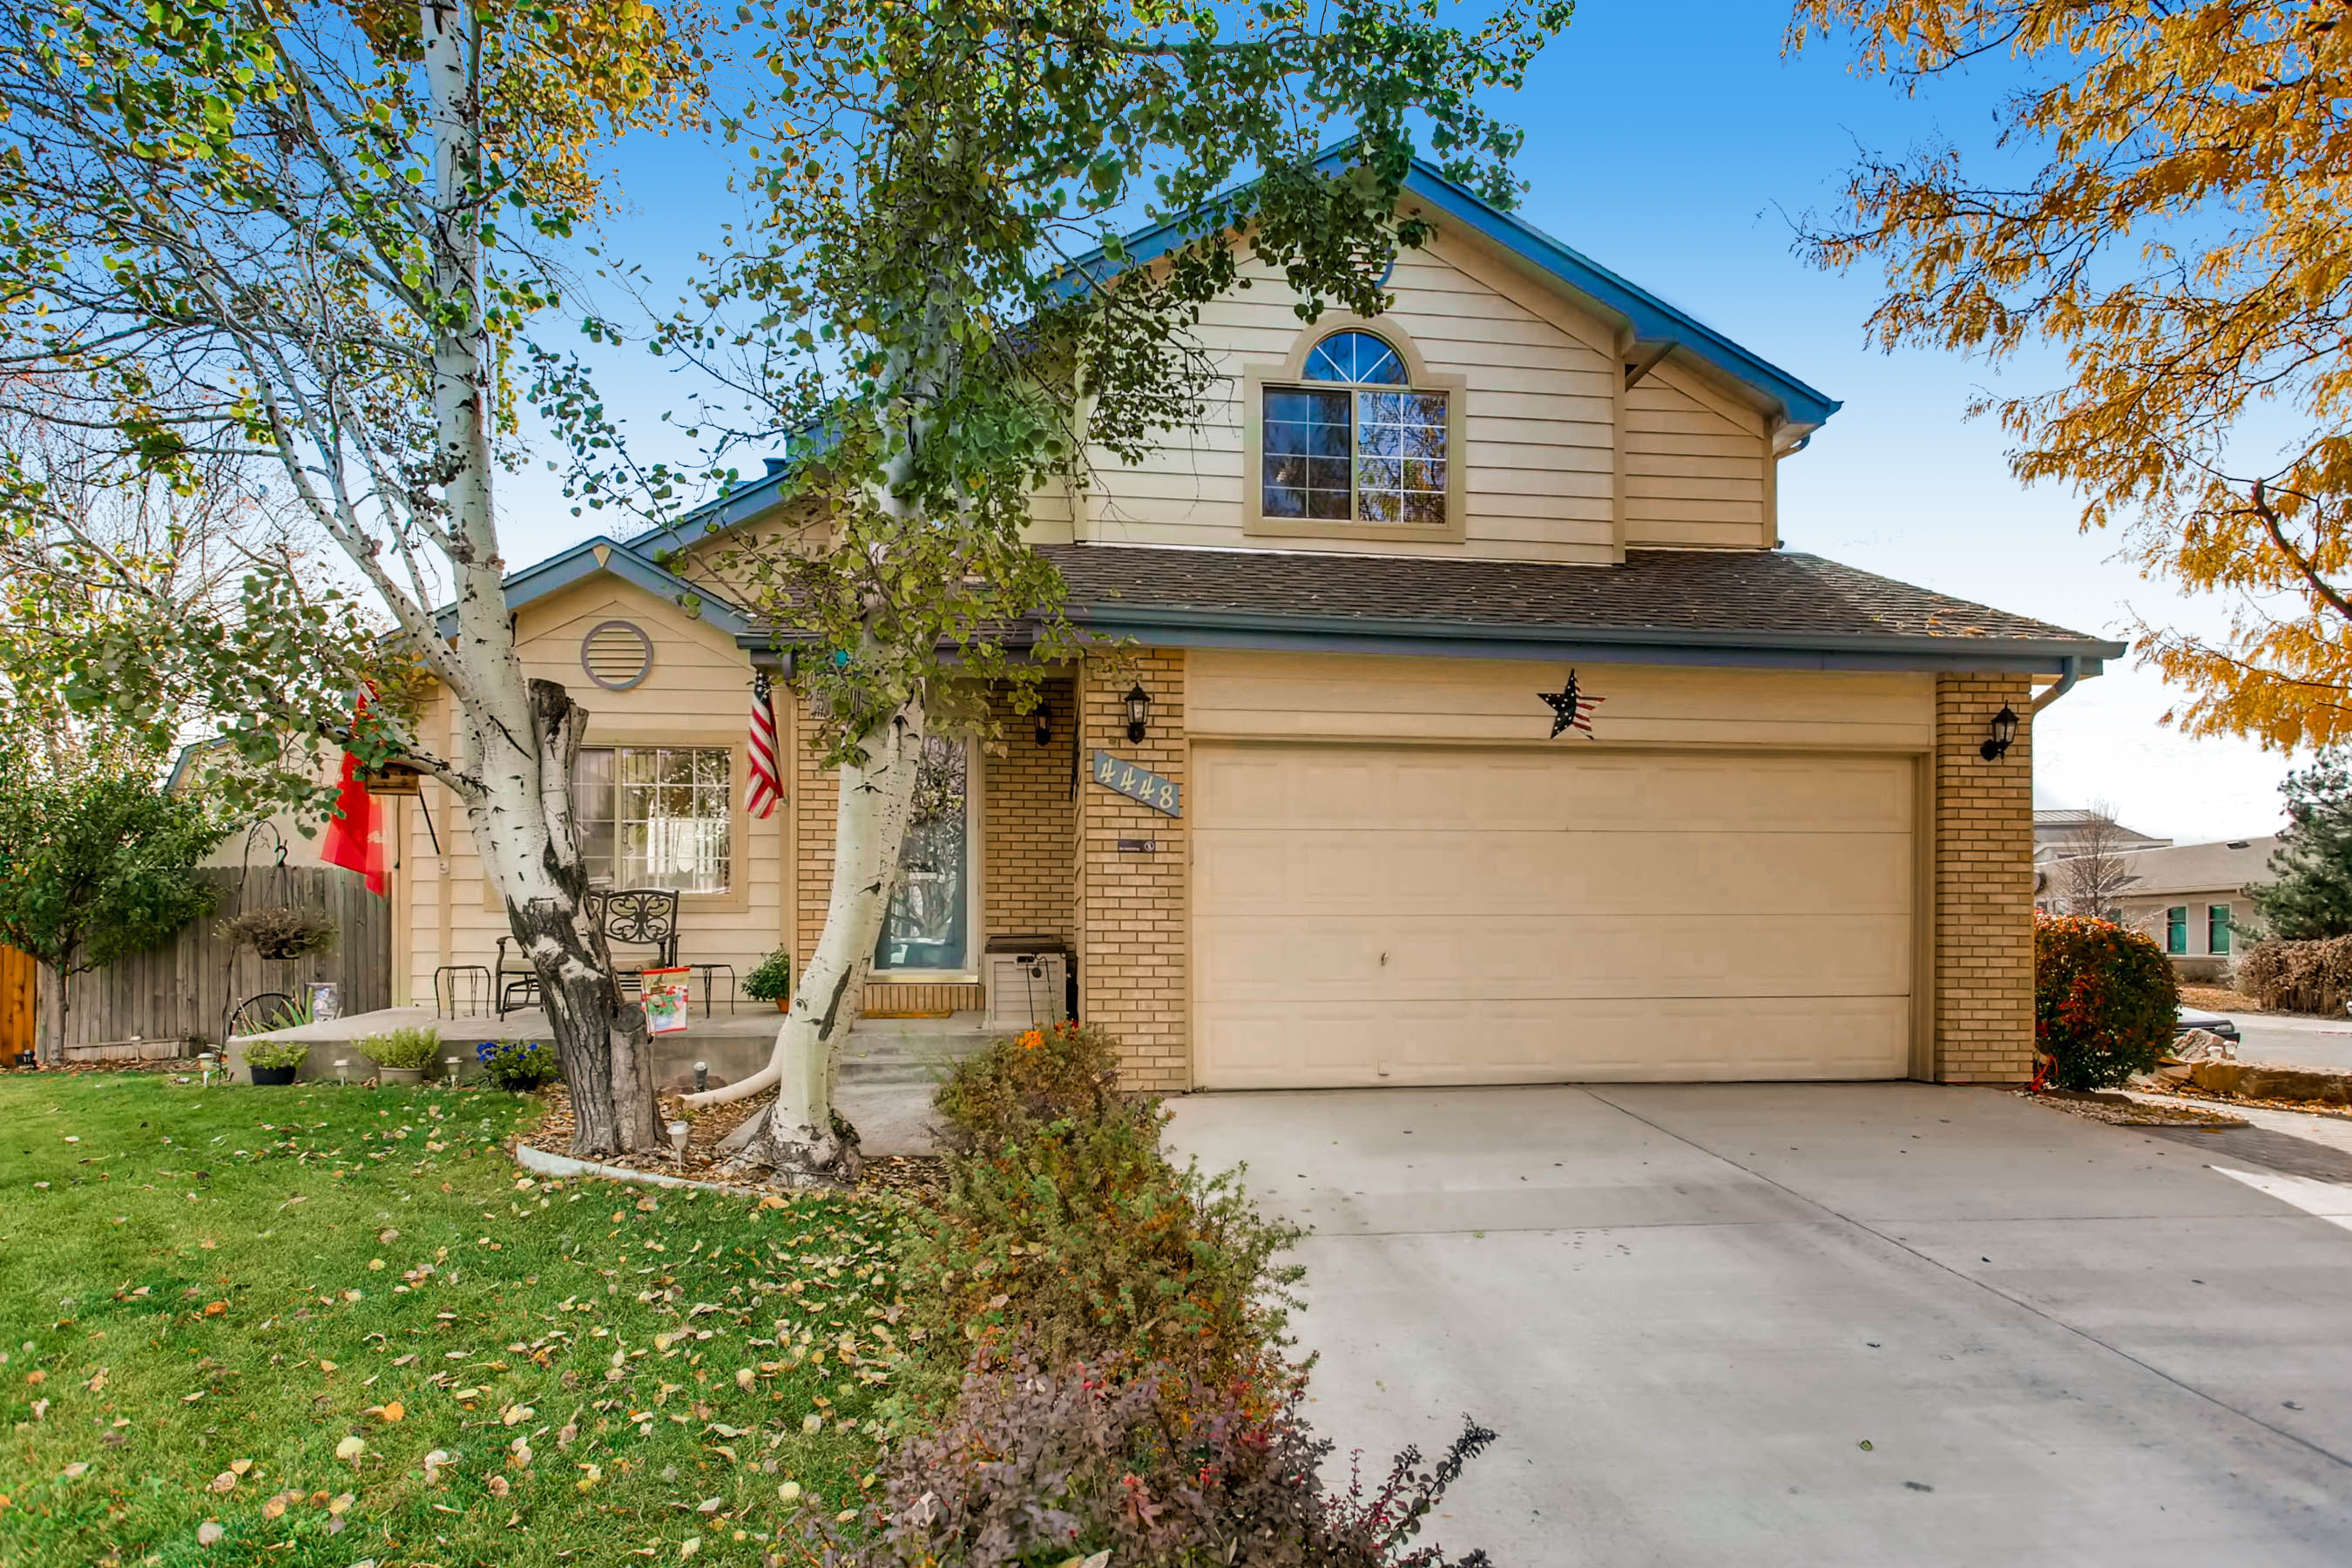
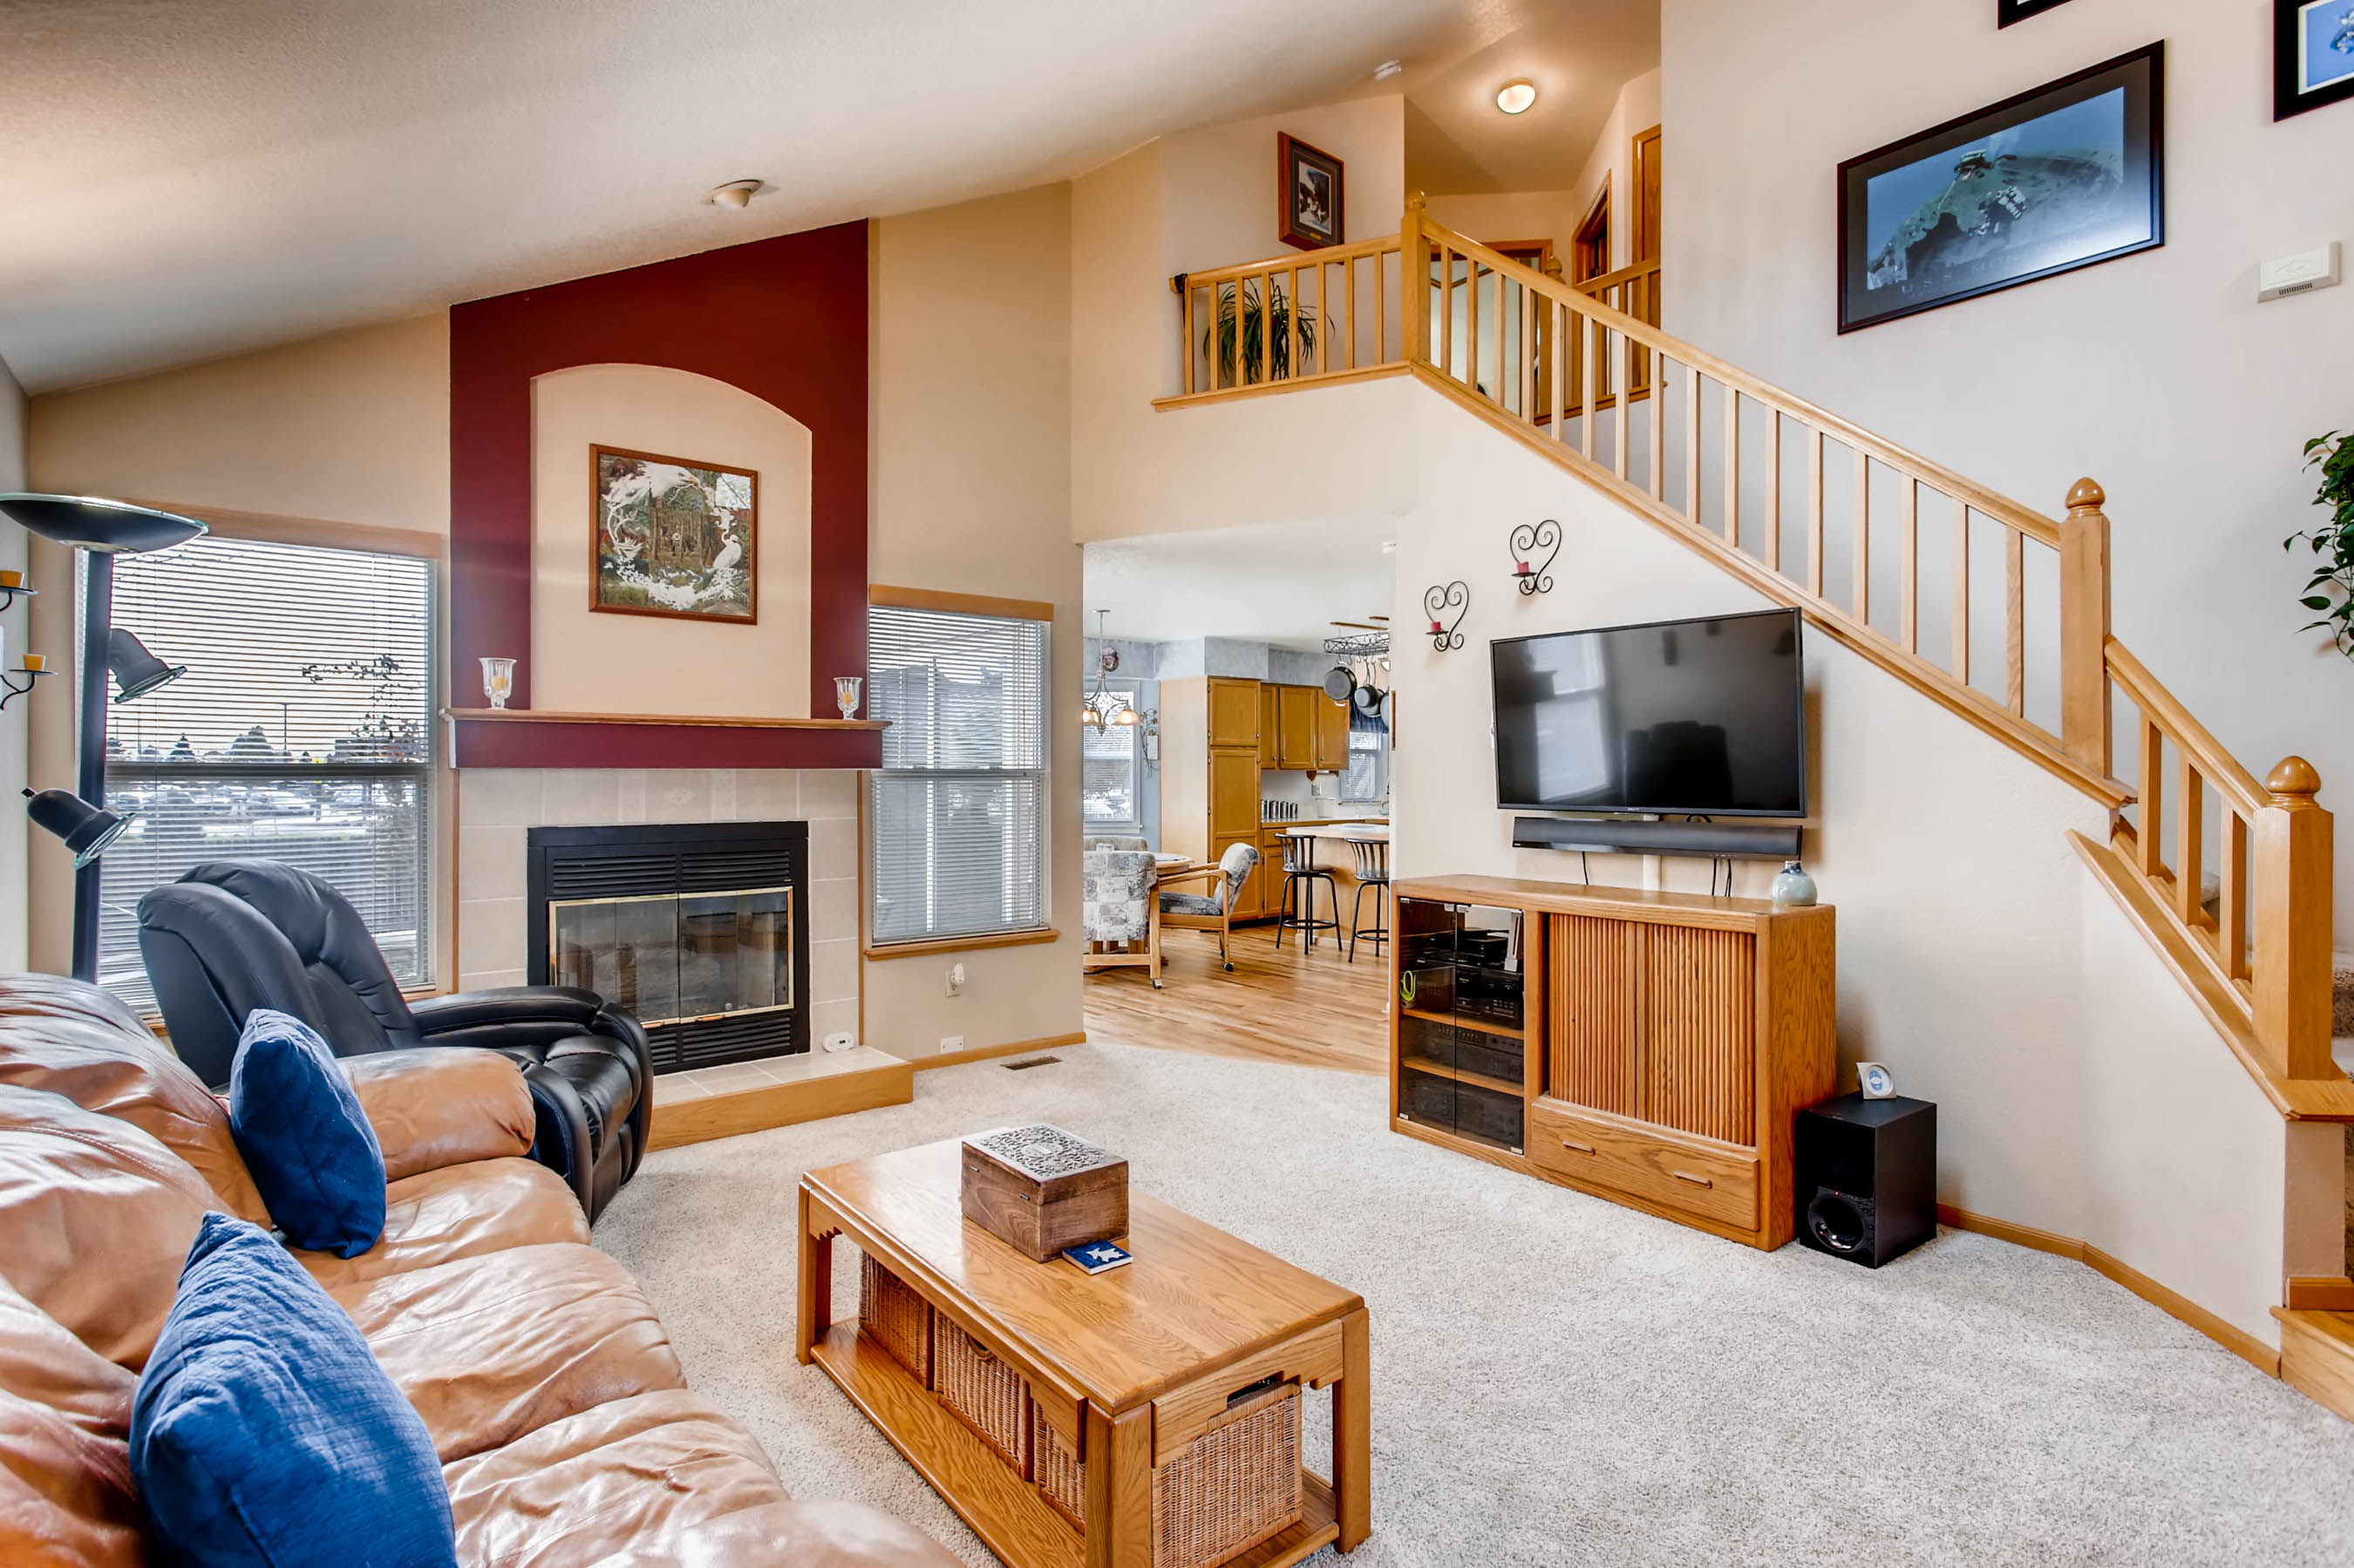
Move-in ready 2-story with large corner lot in Sunstone! Large open family room with gas fireplace opens to bright eat-in kitchen with island and freshly refinished wood floors. Main floor laundry. Enjoy the large fully fenced backyard with patio, fruit trees and garden boxes. Master upstairs has vaulted ceiling with walk-in closet and master bath. Two additional bedrooms complete the upstairs, all with newly installed carpet. Full unfinished basement. Great location with easy access to shopping, schools and I-25.

For more information, please visit: http://windermerenoco.com/listing/69215992 or call Kelly Swift at (970) 460-3033.

The post Turn-Key Home In Southeast Fort Collins appeared first on Best Real Estate Agents in Northern Colorado.

New Features vs. Character

We are often asked, “Which is the better buy, a newer or older home?” Our answer: It all depends on your needs and personal preferences. We decided to put together a list of the six biggest differences between newer and older homes:

The neighborhood

Surprisingly, one of the biggest factors in choosing a new home isn’t the property itself, but rather the surrounding neighborhood. While new homes occasionally spring up in established communities, most are built in new developments. The settings are quite different, each with their own unique benefits.

Older neighborhoods often feature tree-lined streets; larger property lots; a wide array of architectural styles; easy walking access to mass transportation, restaurants and local shops; and more established relationships among neighbors.

New developments are better known for wider streets and quiet cul-de-sacs; controlled development; fewer aboveground utilities; more parks; and often newer public facilities (schools, libraries, pools, etc.). There are typically more children in newer communities, as well.

Consider your daily work commute, too. While not always true, older neighborhoods tend to be closer to major employment centers, mass transportation and multiple car routes (neighborhood arterials, highways and freeways).

Design and layout

If you like VictorianCraftsman or Cape Cod style homes, it used to be that you would have to buy an older home from the appropriate era. But with new-home builders now offering modern takes on those classic designs, that’s no longer the case. There are even modern log homes available.

Have you given much thought to your floor plans? If you have your heart set on a family room, an entertainment kitchen, a home office and walk-in closets, you’ll likely want to buy a newer home—or plan to do some heavy remodeling of an older home. Unless they’ve already been remodeled, most older homes feature more basic layouts.

If you have a specific home-décor style in mind, you’ll want to take that into consideration, as well. Professional designers say it’s best if the style and era of your furnishings match the style and era of your house. But if you are willing to adapt, then the options are wide open.

Materials and craftsmanship

Homes built before material and labor costs spiked in the late 1950’s have a reputation for higher-grade lumber and old-world craftsmanship (hardwood floors, old-growth timber supports, ornate siding, artistic molding, etc.).

However, newer homes have the benefit of modern materials and more advanced building codes (copper or polyurethane plumbing, better insulation, double-pane windows, modern electrical wiring, earthquake/ windstorm supports, etc.).

Current condition

The condition of a home for sale is always a top consideration for any buyer. However, age is a factor here, as well. For example, if the exterior of a newer home needs repainting, it’s a relatively easy task to determine the cost.  But if it’s a home built before the 1970s, you have to also consider the fact that the underlying paint is most likely lead based, and that the wood siding may have rot or other structural issues that need to be addressed before it can be recoated.

On the flip side, the mechanicals in older homes (lights, heating systems, sump pump, etc.) tend to be better built and last longer.

Outdoor space

One of the great things about older homes is that they usually come with mature tress and bushes already in place. Buyers of new homes may have to wait years for ornamental trees, fruit trees, roses, ferns, cacti and other long-term vegetation to fill in a yard, create shade, provide privacy, and develop into an inviting outdoor space. However, maybe you’re one of the many homeowners who prefer the wide-open, low-maintenance benefits of a lightly planted yard.

Car considerations

Like it or not, most of us are extremely dependent on our cars for daily transportation. And here again, you’ll find a big difference between newer and older homes. Newer homes almost always feature ample off-street parking: usually a two-car garage and a wide driveway. An older home, depending on just how old it is, may not offer a garage—and if it does, there’s often only enough space for one car. For people who don’t feel comfortable leaving their car on the street, this alone can be a determining factor.

Finalizing your decision

While the differences between older and newer homes are striking, there’s certainly no right or wrong answer. It is a matter of personal taste, and what is available in your desired area. To quickly determine which direction your taste trends, use the information above to make a list of your most desired features, then categorize those according to the type of house in which they’re most likely to be found. The results can often be telling.

If you have questions about newer versus older homes, or are looking for an agent in your area we have professionals that can help you. Contact us here.

The post New Features vs. Character appeared first on Best Real Estate Agents in Northern Colorado.

3 Design Ideas to Try in Your Bedroom

As far as design goes, bedrooms are pretty straightforward. Pick the typical necessary components — bed, nightstands, dresser — and you’ve got a bedroom. But too often homeowners stop there. The designers for these three bedrooms didn’t. They took a holistic approach, embraced built-ins and celebrated simple white walls to turn what could have been ordinary rooms into spaces worth bragging about.

Related: Discover Nighstands in Every Style

Bedroom Projects 1: Erik Biishoff, original photo on Houzz

1. Holistic Approach

Designer: Architect David Edrington

Location: Eugene, Oregon

Size: 14 by 28 feet (4.2 by 8.5 meters)

Year built: 2007

Homeowners’ request: A cozy bedroom with a great view and access to an outdoor room with a comfortable place to sit. This was part of a new home.

Plan of attack: Architect David Edrington used an architectural method detailed in a book titled A Pattern Language to help flesh out the deeper idea of how the homeowners wanted the bedroom to function and how it should be experienced in terms of intimacy, which direction the bed should face and the flow to other rooms. “The primary patterns were ‘intimacy gradient,’ ‘sleeping to the east,’ ‘sleeping alcove’ and ‘the flow through rooms,’” Edrington says.

Why the design works: Simplicity and smart planning. “My work is about the common principles that come from the human experience with spaces,” Edrington says. “The beauty of this bedroom comes not from any unique situation or odd problem that needed to be solved. The beauty comes from the simplicity of the decisions guided by A Pattern Language. The bed is in an alcove-like space that is just big enough for the bed, side tables and room to move around. It has windows on three sides, including one on the east for morning light and several on the west for the evening view of the Oregon Coast Range.

Bedroom Projects 2: Erik Biishoff, original photo on Houzz

Related: Measurements to Remember When Designing Your Dream Bedroom

“Opposite the bed is a sitting space just big enough for two people, with a fireplace and some book storage. The fireplace is raised, so it’s visible from the bed. The proportions of the room are about 2:1, which means it’s naturally two spaces. In between the two spaces there is a thick half wall made of cabinets and columns and beams, which is a continuation of a theme used throughout the house.

“The room has a gently vaulted ceiling that supports the cozy human scale. The walls and ceilings are made of integral colored plaster, which is also a continuation of the wall finishes used throughout the house. The cabinets, windows, trim and other wood detailing is done in Douglas fir, because that’s our local wood and it has a beautiful color and grain.”

Who uses it: A couple in their late 50s and early 60s, who work at home

The nitty-gritty: Cabinets: clear Douglas fir, The Cabinet Factory; walls: colored plaster; floors: bamboo, Imperial Floors

Team involved: Dorman Construction (general contractor); Erik Bishoff (photographer)

Bedroom Projects 3: Garcia Stromberg, original photo on Houzz

2. Embracing Built-Ins

Designer: Garcia Stromberg

Location: Stuart, Florida

Size: 14 by 20 feet (4.2 by 6 meters)

Homeowners’ request: A contemporary yet classic look with clean, straight lines

Designer secret: Strategically planned built-ins save space.

Plan of attack: Create as much livable space as possible, then focus on the view. “Then the built-ins brought the whole room together,” designer Garcia Stromberg says.

Why the design works: “The design of the linear lines worked flawlessly with the natural colors that were incorporated from the view of the outdoors,” Stromberg says.

What wasn’t working: “The biggest challenge was the narrow space and fitting a comfortable amount of furnishings and decorations in the space while still portraying a contemporary look,” Stromberg says.

Splurges and savings: The homeowners saved on furnishings but splurged on built-ins.

Team involved: Palm City Millwork Inc.

Bedroom Projects 4: Eric Charles, original photo on Houzz

3. Off-the-Shelf White Walls

Designer: Carley Montgomery

Location: Silver Lake neighborhood of Los Angeles

Size: 20 by 28 feet (6 by 8.5 meters), or 560 square feet (52 square meters)

Year built: 2015

Homeowner’s request: This home was built on spec for a future owner. Carley Montgomery acted as the architectural designer, interior designer, general contractor and developer. She envisioned modern clean lines and flexible living space for this house, which could be used as a guest house, an office or an artist’s studio.

Designer secret: Plain white walls. “Everyone gets all crazy trying to pick the perfect white,” Montgomery says. “While in many circumstances this is vital to match the furniture or warm a space with a hint of color, I find off-the-shelf white is the most universal, easy and safe color for modern homes.”

Plan of attack: Montgomery designed the home from the ground up, positioning it to capitalize on unobstructed views. Large floor-to-ceiling windows bring in light and views of downtown Los Angeles, which Montgomery wanted to highlight by keeping the interior design minimal. “It’s incredible at night,” she says. “The desk behind the sofa allows you to work and also enjoy the view.”

Why the design works: “This entire space is only 560 square feet and feels so much larger,” Montgomery says. “The ceilings are vaulted, creating a loft-like feel. But the flow of the space is what really works. We fit a full kitchen, full bath, dining area, living area, desk and bed in the space, and it doesn’t feel crowded. This has everything to do with the placement of the entry door, kitchen and bathroom inside the space. It is vital to place your furniture on your plan when in design so that you maintain flow through the finished space.”

Bedroom Projects 5: Eric Charles, original photo on Houzz

Related: Park a Bench at the Foot of the Bed

“Uh-oh” moment: “If this were a project being built for a homeowner, there would have been numerous ‘uh-oh’ moments. There always are,” Montgomery says. “Being that this is my business and I’m acting as owner representative, designer and contractor, decisions are quite simple. The only issue is trying to anticipate what the buyer of the property is going to want. It’s like working for a mystery client.”

Take-away: The value of well-planned and thought-out design

Team involved: Jordan Christian (artist); Corbin Poorboy of The Here Co. (styling); Eric Charles (photographer)

By Mitchell Parker, Houzz

The post 3 Design Ideas to Try in Your Bedroom appeared first on Best Real Estate Agents in Northern Colorado.

Real Estate Buyer Tip: How to Find a Deal

If you are ready to buy a home in a seller’s market, don’t despair. Windermere Real Estate agent, Michael Doyle, shares how you can find a good deal on a great home, even in the hottest housing market.

The post Real Estate Buyer Tip: How to Find a Deal appeared first on Best Real Estate Agents in Northern Colorado.
5 Stunning Siding and Brick Combinations

We love brick. Who doesn’t? The building material of choice for ages, it is revered for its rich, organic texture, color and visual interest. And it only gets better with time, the color having more depth after baking in the sun for years.

Related: Hire a Siding and Exterior Expert Here

If you’re building or remodeling and brick will be part of your home’s exterior, it’s worth considering how different siding materials can be paired with brick to create different design and textural effects. Here we look at five distinct siding options — horizontal, shingle, board and batten, stucco and metal — that work hand-in-glove with classic brick.

Siding 1: Bennett Frank McCarthy Architects, Inc., original photo on Houzz

Horizontal Siding

Horizontal siding comes in many forms, including vinyl sheets, wood planks and fiber cement boards. It offers many design possibilities that can break up the look of dense brick and add visual interest.

1. Go wide and modern. The aesthetic of horizontal dark-stained wood siding skews modern when installed above brick on this remodeled, split-level home. This rich style of siding gives the pictured home a sleek appeal; similar siding can be used to transform a tired exterior into an updated jewel.

2. Choose a precise color match. If you’re going for a completely new look for the exterior, consider color-matching your siding and brick. The result is a cohesive main color field that gives trim and shutters a chance to stand out.

3. Create a subtle accent. The siding adds a modest decorative element on a home that might look less interesting in solid brick.

Siding 2: Brooks Ballard, original photo on Houzz

Cedar Shingles

Cedar shingles, or shakes, as they are also known, are versatile in terms of their look and how they can be installed. Whether you use real wood or a composite material, keep them natural, stain them or paint them, they can be used with brick to evoke various architectural styles.

1. Dress up a Craftsman. The shingles here are the cherry on top of this quintessentially Craftsman-style home, with its deep overhang, decorative brackets and columns. The shingles are stained to coordinate nicely with the brick at the skirting and base of the columns.

2. Be dramatic and modern. Dark colors are striking when used as the predominant color on an exterior.

3. Go beachy. This type of siding, originally used on this style of home on the East Coast, was intended to withstand a harsh Atlantic weather beating, requiring little care. If you have a brick-clad Cape Cod, the cedar shingles are a design detail you may not want to leave out.

Siding 3: Meridith Baer Home, original photo on Houzz

Board and Batten

This classic siding installation is characterized by wide, vertical wooden boards joined together with a strip of wood or “batten” covering the seam. When paired with brick, each element has enough of its own distinct visual appeal that they both shine.

Related: Outdoor Lights to Give Your Home a Welcoming Glow

1. Paint it out. In this photo, the board and batten and the brick are painted to match each other, as well as the trim and doors. This works to allow for one popping accent color on the shutters. Color matching the elements also allows the the natural lines of the vertical boards to create a subtle textural contrast with the lines of the brick.

2. Keep the eye rising. The vertical installation of board and batten siding draws the eye upward and gives the illusion of some extra height. Here’s another color-choosing trick for siding: Look to your brick’s mortar for the shade that works best with your house.

Siding 4: Studio C Architecture & Interiors, original photo on Houzz

Stucco

Another versatile material that can work well with many different architectural styles, stucco cooperates naturally with brick. Why? Their respective textures play off each other so well. The relative flatness of the stucco can work beautifully as a canvas for brick’s coarse nature and make it really stand out.

1. Layer the texture. This photo is a great example of how stucco can work as expected with brick on a very classic and traditional Tudor-style house. It also reveals the dense texture of the stucco. This material is available in finishes ranging from smooth to coarse, and layering a rougher stucco with brick’s natural surface can be an appealing look.

2. Use brick as the accent. Using the brick as an accent to the stucco is a great option in some parts of the country where brick is not as plentiful or if budget is a concern, as brick is the more expensive material of the two.

Siding 5: carterwilliamson architects, original photo on Houzz

Metal Siding

Perhaps not as ubiquitous as the other siding options, metal is a great choice for your brick house if you’re looking for something provocative and unexpected. It’s also versatile and available in many forms, and it can be installed vertically, horizontally or diagonally, depending on the look you’re after.

1. Use it as part of a design recipe. As the French mirepoix mix of celery, carrot and onion is the foundation of many culinary dishes, so the combination of metal, brick and wood often is the basis of modern architectural design. In this photo, the metal works in conjunction with the other materials to create a delightful harmony of elements, each with its own visual interest.

2. Create tension. The dark of the metal is the perfect material to play off the warmth of the red brick, providing a smart design tension between the modern and the traditional.

By Nicole Jacobs, Houzz

The post 5 Stunning Siding and Brick Combinations appeared first on Best Real Estate Agents in Northern Colorado.
3 DIY Renovation Ideas You Might Want to Steal

Our series on reader renovations of kitchens, bathrooms and laundry rooms has garnered many comments, with plenty of readers chiming in about the features they love. Here, we round up some of the brightest ideas from the Reader Projects featured so far. Perhaps you’d like to try them in your own project.

Reader Remodels 1: Original photo on Houzz

Related: See More Bathroom Remodeling Ideas

Reader Remodels 2: Original photo on Houzz

1. Aging in Place in California

Bathroom at a Glance

Who lives here: Beth Sawatzky

Location: Healdsburg, California

Size: 50 square feet (4.6 square meters)

Total cost: $22,026

Construction time: One month

Great idea: Adding grab bars and a curbless shower. These features anticipate the need to accommodate a wheelchair — or even just avoid the potential hazard, as the homeowner ages, of stepping over a shower curb.

“Wow — that bathroom would be a positive sales feature for a buyer of any age,” writes Jannie in a comment. “I’d like to see the aging-in-place adaptations built into more homes from the get-go. Just the curbless showers and reinforced framing for super sturdy grab bars would be so much cheaper to do on the initial build.”

Related: Find a Design-Build Firm That Specializes in Universal Design

Reader Remodels 3: Original photo on Houzz

2. An Update in San Francisco

Kitchen at a Glance

Who lives here: Houzzer Christa Martin and her husband

Location: San Francisco Bay Area

Size: 90 square feet (8.4 square meters)

Cost: About $35,600

Construction time: Three weeks

Reader Remodels 4: Original photo on Houzz

Great idea: A a pullout pantry placed between the refrigerator and the wall ovens.

Reader Remodels 5: Original photo on Houzz

3. Enjoying the Views in Washington

Kitchen at a Glance

Who lives here: Jo Ann Snover and her husband

Location: Woodinville, Washington

Size: 350 square feet (32.5 square meters)

Cost: $99,021

Construction time: Four months

Reader Remodels 6: Original photo on Houzz

Great idea: This Seattle-area kitchen renovation has a couple of ideas you might want to steal. It removes cabinetry to make room for light — and in this case, beautiful views. To make up for losing those cabinets, the homeowners added some under-the-stairs pullouts where they stash appliances.

By Erin Carlyle, Houzz 

The post 3 DIY Renovation Ideas You Might Want to Steal appeared first on Best Real Estate Agents in Northern Colorado.

Inventory Is Up

For the past few years the hot topic in Northern Colorado real estate is inventory, or more specifically, lack of inventory.

Based on our current research, it looks like this trend is reversing.

Let’s look at the increase in inventory in our major markets versus a year ago…

  • Fort Collins up 28%
  • Loveland up 4%
  • Windsor up 37%
  • Greeley up 5%

This increase in is very good news for prospective buyers as now there are more homes to choose from.

To see an update as to what is happening in the Northern Colorado market, contact us to receive our quarterly “Scoop” report.

The post Inventory Is Up appeared first on Best Real Estate Agents in Northern Colorado.